Basics
The normal operation of the Axio Scan.Z1 once you have a profile set up.
These documents are to reinforce, not replace, hands on training on the microscope. All users MUST recieve training from Cell Imaging Staff prior to use of the instrument.
Start up
- Turn on the power strip (Orange Dot #1) - wait 30 seconds.
- Turn on the Axio Scan.Z1 (Orange Dot #2) - wait until the top left light is green.
- If doing fluorescent imaging, turn on the X-Cite (Orange Dot #3).
- Start the Zen software:
- As is starts, click on the Zen Slidescan (not Image Analysis).
- Watch for error messages.
Preparing your slides
Make sure that your slides are clean. Surface dirt will get in the way of focusing and imaging.
If you are going to use the Marker method for tissue detection, draw Sharpie lines on the cover slip that surround the tissues. Make sure the line closes and go over any faint lines. (The Marker method is most often used for fluorescent imaging when there is not strong visual contrast between the tissue and the slide.)
Loading slides
Slides are held in trays. The trays are loaded into the scanner. A single tray can hold 4 normal slides. The scanner can hold 25 trays.
The trays have spring tensioned holders for each slide. While you can load a tray by hand, it is easier with the loading aide (the big black block).
- Put the tray in the block and swing the lever back. This will open all of the slots.
- Place your slides in place coverslip and label up.
- Swing the lever forward. This should clamp your slides into the tray. Check that they are secure.
Loading trays into the scanner
- Open the door, using the software or the button.
- Swing open a tray holder.
- Fill a holder with a tray. Cover slips / labels up and toward you.
- Swing the tray holder back into the scanner.
- Close the door, using the software or the button.
Storage location

Open the Storage Location tool and select the file that your data will be stored in. The file folder will get you to a browser where you can select the folder and/or create the folder. Include your name or your lab name in the file path.
Double check that the correct path is in the storage location tool.
Data must be stored on the data drive. Not the C: drive, not the Desktop, not the Documents folder.
- At the end of scanning, please copy your data to your portable drive.
- If you could delete your old data at some point, that would be appreciated. However, we understand that you don't want to delete it until you have it backed up in your own system.
- We attempt to provide space for about 6 months of data, and we will delete old data as space becomes limited. While we generally send out warnings, if we get desperate, we will delete older data first.
- We do not guarantee against a hard drive failure. We do not back up the data drives on any of the microscopes.
Naming definition

Typically, the naming definition is "date + increment." This means that files will be named like:
2022_11_21_0123.czi
If you do want to change the definition, please change it back when you are done.
You can also define the name of each image manually after the Prescan in the Magazine tab view.
Scan profile
A scan profile is a set of parameters that determine how the scan will be done (e.g., what objectives, what channels,...). Typically, you will re-use your scan profile as is so that all of your imaging is consistent. You may want separate profiles for different sets of samples or it different magnifications are needed.
Select a default scan profile

If all of your slides will use the same scan profile, selecting the Default Scan Profile will apply that profile to all of your slides. The down arrow will show a list of all the scan profiles you can select.
Setting the profile for a single slide

If some need a different profile, they can be set on a slide by slide basis in the Magazine view. The down arrow by the slides profile will show a list of all of the scan profiles you can select.
Modifying or creating a scan profile
Profiles are created or modified with the Advanced Profile Wizard. That is outlined in a separate page "Profile Wizard."
Start preview scan

Pressing "Start Preview Scan" will take a picture of your slide that will be used to verify and/or modify the tissue selection. This scan will be done for all the slides that have been selected (have a check box to their left).
Tissue detection wizard
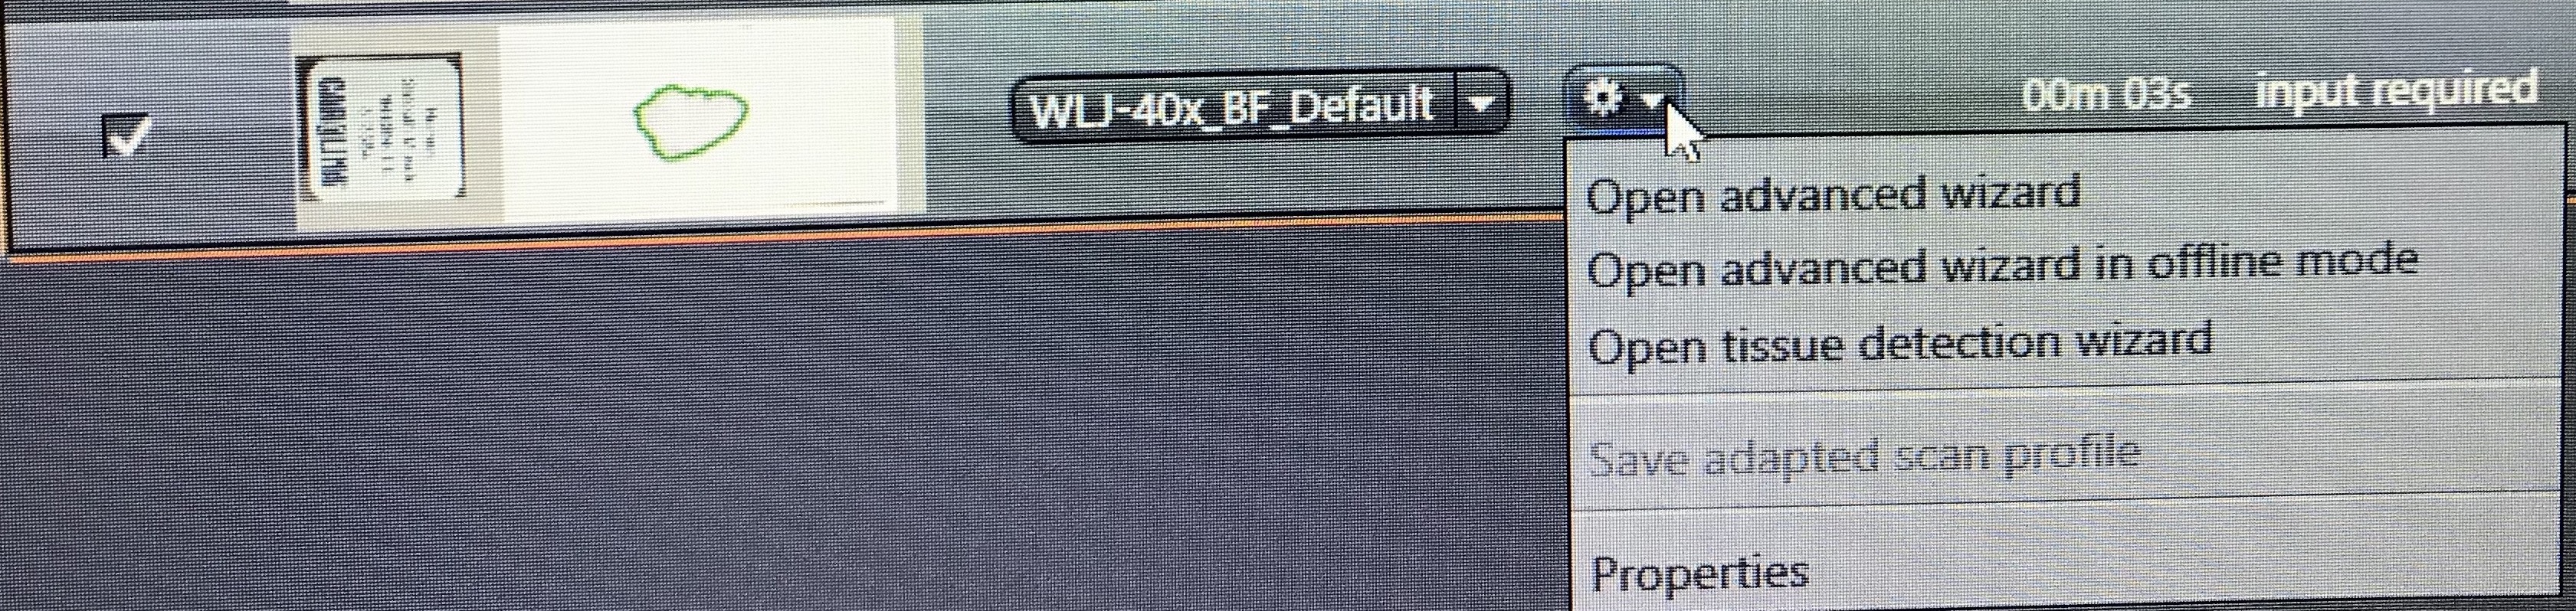
Once the preview is done (on at least one slide), Use the gear next to the preview to open the Tissue Detection Wizard. This is where you will:
- Remove any spurious detections.
- Improve or redo detections.
- Optionally, connect tissues.
- Click Next to move on to the next preview.
- Click Finish when done with all the previews.
The tissue detection image

In the center of the screen will be the results of any automatic tissue detection. The green shapes are the detected tissues. If there are tan areas, they are areas that are used for collecting shading correction data. A red rectangle is the area of the slide that was used for tissue detection.
The mouse scroll wheel can be used to zoom in and out.
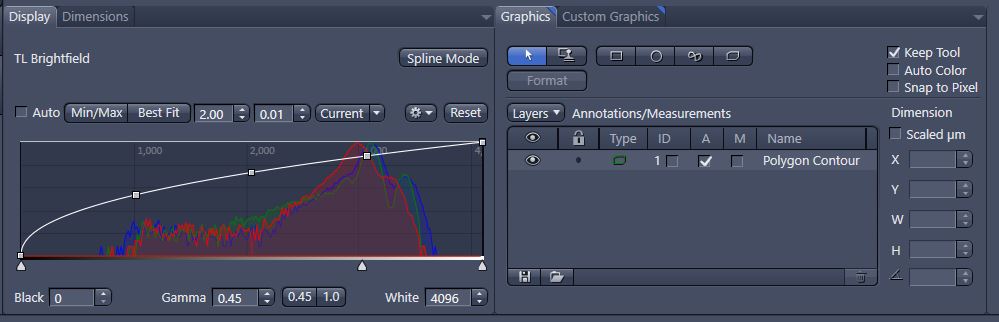
Editing the tissue detection
- The Display tab has the LUT and this can be manipulated to make it easier to see your tissues.
- The Graphics tab has the tools for working with the tissue detections.
- The Arrow tool is the selection tool. Use this to select annotations on the image.
- The four draw modes Rectangle, Circle, Spline and Polygon are used for drawing new annotations.
- To remove an annotation, select it on the image or in the list and press "Delete" (not backspace) or use the Trash Can at the bottom of the list.
- If a stray click selects the red rectangle and you can't edit annotations anymore, select one of the draw modes.
- The Keep Tool check is useful if you are going to make a lot of the same operation (e.g., draw a bunch of rectangles). Just remember to go back to the Arrow when you want to get back to selections.
Connecting tissues (optional)
Each separate tissue will become an individual "scene" in your image file. This will result in the smallest files, especially if you eventually export your data as OME-Tiff. However, depending on how you analyze your images, it can be useful to connect your tissues so that there is a single "scene."
- Use the polygon tool.
- Left click to start and add points to your polygon. Right click to finish.
- Draw thin (zero width) polygons that link tissues.
- In the tissue list, select all the tissues.
- In the view window, right click in a tissue and select "Merge."
- Verify that all the tissues merged into 1 (check the list of detections). Sometimes, Zen gets confused and leaves some separated.
Previous, Next, Finish, Cancel
When you are done editing the tissue detection, press one of the 4 buttons:
- Previous: Go back to the previous slide
- Next: Move on to the next slide
- Finish: Once you are done with all the slides, click Finish.
- Cancel: If you feel like you need to start over, cancel without saving changes.
Scan

Before you press Scan
- Make sure that all the appropriate slides are selected/de-selected (check box to the left of the preview). These are the slides that will be scanned.
- Make sure that tissue detection is done for all the selected slides.
Press Start Scan
Each slide presents an estimated time for the scan. These are usually much more time than it will really take. Hour long estimates might be 15 minute scans.
Wait for the first image
When the first image is done, double click on it in the Magazine tab. This will bring the image up in its own tab in the viewer. Make sure that this one looks good before leaving. This is the time to stop the scan process and fix any problems.
To Rescan
Once a slide has been scanned, it will say "finished." In order to rescan it, first Right-Click in the gray part of the slide bar and select "reset scan status to new."

Inspect your images
Once your scans are all done, check them over. Especially look for focus problems. These may require adapting your scan profile to include more focus points.
Along the left side of the image view area are Image View Tabs. 2D is the normal view. Info will show the scan parameters.
At the bottom are the Dimensions and Display panes.
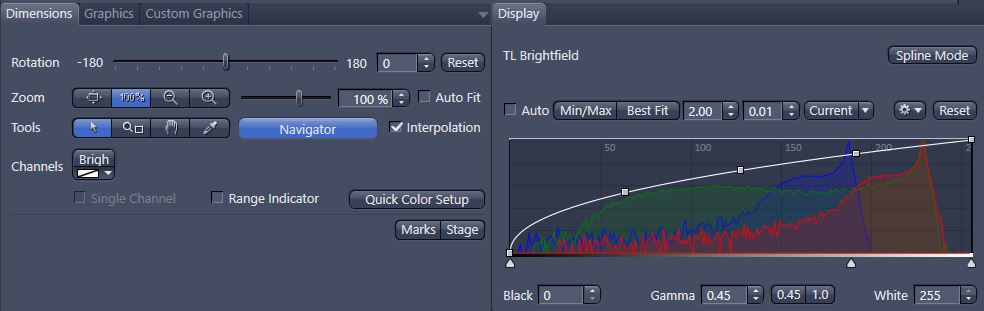
Dimensions pane:
Zoom
The zoom of the display can be set in the Zoom row or with the mouse scroll wheel. The current zoom will be displayed in the Zoom row.
Channels
If your image has multiple channels, you can select which channels are displayed by clicking them on and off.
Scenes
If your image has more than one scene (tissue detection), there will be a slider above the Rotation slider. This is where you will select what scene to display.
Navigator
Display pane:
In the display pane, you can manipulate the LUT for the current image. This does not affect your data, just the display.
Shut down
Check:
- Slides are out.
- Trays are back in place.
- Door is closed.
Shut Down:
- Exit the Zen software.
- Turn off the X-Cite if it is on.
- Turn off the AxioScan. Wait for the top left light to go out.
- Turn off the power strip.
- Copy your data to your portable drive.
No comments to display
No comments to display