Users Guide
The general users guide for resource.cores.utah.edu
- Login
- Manage User Account Details
- Create a Line Item / Non-Scheduled Order
- Create a Scheduled Event / Order
- View Previous Orders / Invoices
- Request Charge Account Access
- Create a Black Box Sample Processing Order
- Create a Walkup Order/Event
- New User Guide
Login
The cores resource system supports 2 different login formats:
- System Local Login
- SAML Supported 2FA Login
Users may login to the system using any of these methods with the following caveats:
-
- External users (users without a uNID at the University of Utah) will need to use the system local login as created by the administration office
- All users must be manually added to the system by requesting access from administration office directly or via a work authorization request.
- The username/password login directs users to the System login action.
- The DUO 2FA (SAML) Login process is similar to the LDAP login process but uses the University of Utah Duo servers.

System Local Login
DUO 2FA Login
Note: If you are already logged into the University DUO system (eg. logged on to CIS) clicking the DUO login button will log you on automatically.
Manage User Account Details
Users can manage their personal contact information, manage message/notification settings and set their default charge account from the "My Account" page.

Update Details
- Change any details desired
- Click the "Save Changes" Button
- (Optional) Click the "Revert Changes" button to restore the data

Set an account as default
1. Click the "Make Default" button in the "My Charge Accounts" Section

Opt Out of Email Notifications

Change login password (Local System Users Only)
- Enter the desired password in the "New Password" and "Confirm Password" fields
- Click the "Change Password Button
Note: Users with LDAP/DUO Logins will see "University Login" in place of the "Update Password" Box

Profile Picture
1. To add or change your picture, click the "Browse" button and select an image from your computer. (It much be an image type i.e. .jpg, .png, etc.)

2. Once you have selected an image, you will see a preview of the image with a red border. Make sure to click the "Upload Profile Picture" button to upload it to your account details.

3. After a successful upload, you will see a confirmation that your account profile picture has been updated.

4. To remove a profile picture, click the red 'x' button next to your image.

5. You will see a confirmation dialog where you can agree to delete the picture or cancel the action.

6. After you delete your image, you will see a confirmation that it has been deleted and you will no longer see a profile picture on your account details.

Create a Line Item / Non-Scheduled Order
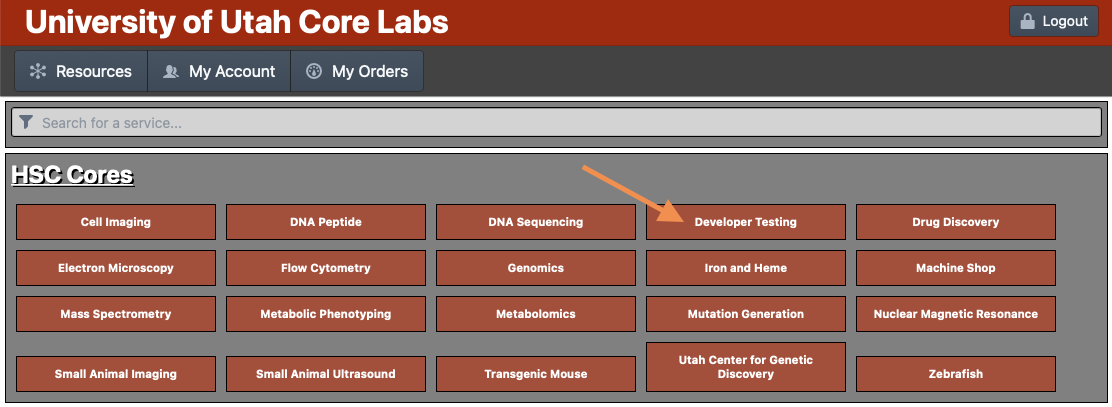
For groups that have a user facing order forms use the following steps to create a new order.
- Select the Group you want to order from

- Select the Line Item service you want to order from

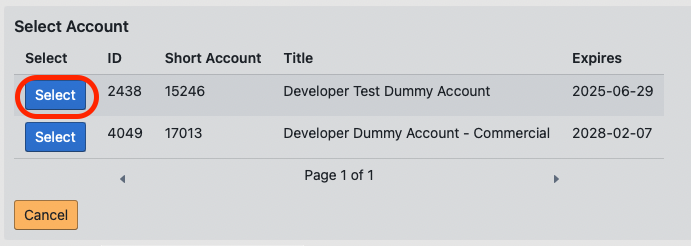
- Select the account you want to charge this order to. (Note: If no accounts are listed there may be no valid accounts available to be charged. Accounts may be invalidated manually by the administration office OR automatically by the system if the account expires. Contact the admin office for any account issues.)

- Click on the button corresponding to the account you wish to charge to

- Fill out the remainder of the form and click the "Submit" button. (Note: If anything is incorrect on the form the "Submit" Button will remain grayed out)

- When the system has created the order a dialog with your order number will pop up. Clicking out of this dialog will send you back to the group services list. If there was an error creating your order the pop-up box will contain the error message. Please screenshot or save the error message text to send to the system administrators for debugging if the error persists between attempts.


Create a Scheduled Event / Order
For groups that have a user facing order forms use the following steps to create a new order.
- Select the Group you want to order from
- Select the scheduled service you want to order from

- Select a starting time from the calendar and single click on the slot

- Adjust the start time and event duration in the details window as needed (Note: Error messaged regarding limits on the event details will appear at the top of the event in red. Some services have restrictions that can be bypassed depending on which account they are getting charged to.)
- Select the account to charge the order to
- Fill out any additional fields as needed
- Click the "Create Event Button"


If there was an error creating your order the pop-up box will contain the error message. Please screenshot or save the error message text to send to the system administrators for debugging if the error persists between attempts.
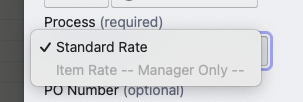
Disabled Processes
Some processes are only available to facility managers these rates will be be marked as such and will not be selectable
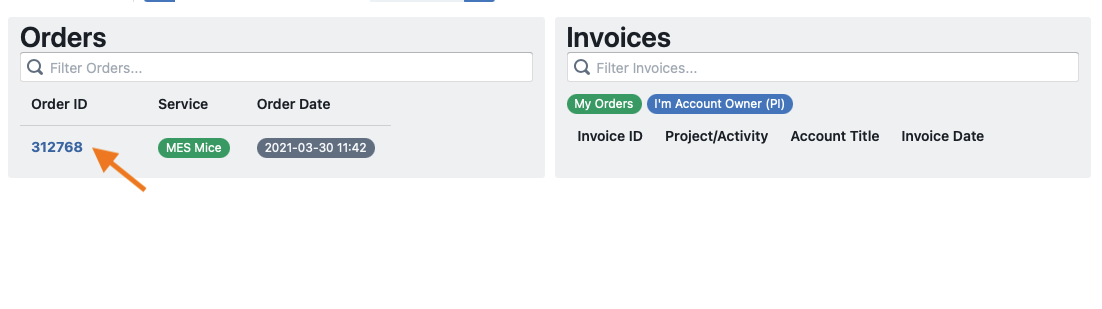
View Previous Orders / Invoices
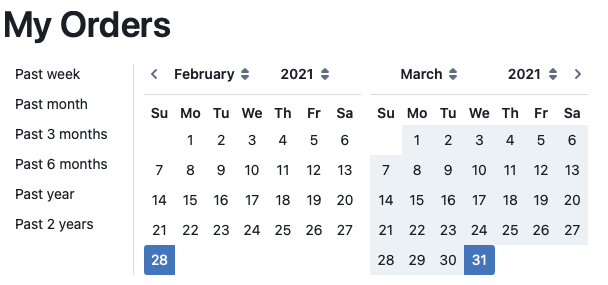
To view any orders or invoices that belong to you use the following steps:
- Click on the "My Orders" button on the top menu bar.

- Select a date range

- Click on the Order Number or Invoice Number to view the details


Request Charge Account Access
All orders created in the resource management system require an account to be charged against even if that order has a zero dollar value. Accounts come in 4 types:
- On Campus Accounts - These accounts come with a chartfield number and are used to transfer funds internally
- Off Campus Educational Accounts - These accounts are governed by federal intra-institution guideline and have a specific F&A rate automatically attached to them
- Commercial Accounts - These accounts are for outside entities that do work with the universities such as companies or non-profit organizations
- Dummy Accounts - These are internal placeholder accounts that automatically exclude any orders charged to them and are controlled by the cores administration office primarily to allow group managers to schedule time on their own equipment for downtime or maintenance.
Request Process
Users will be unable to order services in the system until they have an account permission attached to their user login. Users can request that an account permission be added to their account by going to https://workauth.cores.utah.edu and filing out a On-Campus or Off-Campus/Commercial Work Authorization form.
Submission
- Go to https://workauth.cores.utah.edu
- Select either "On Campus" if you are doing work for a department of the University of Utah or "Off Campus/Commercial" if you are an external entity.
- Fill out the form:
- Submitter Information - Your contact information
- PI/Approving Contact - The contact information for the person responsible for authorizing charges on the account in question
- Accounting Contact - The contact information of the person responsible for resolving issues with the account
- Any comments
- Add the list of users approved to be added/removed from the account. This includes anyone listed in the previous sections if they need authority to charge to the account in question.
- Submit the form
Approval
After submission the work authorization system will send an email to the individual listed as the approving contact. To ensure that they are ready to respond to this email it is recommended that they be notified prior to submitting the request. This person will be provided a link to open and review the submitted for approval or denial. If the request is approved then the cores administration office will be notified by email and the request processed. If denied the submitter will receive an email with the denial as the address provided.
After the admin office has processed the request they account access should be available immediately after processing. For questions about a submitted work authorization contact the cores admin office.
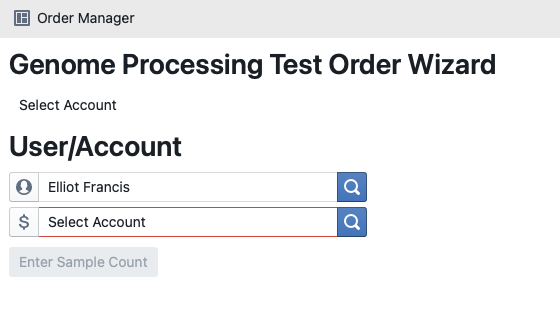
Create a Black Box Sample Processing Order
The Black Box Sample processing system uses an order wizard that will guide the user through the ordering process.
- Select an account

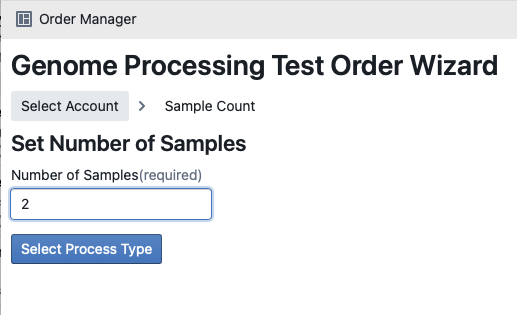
- Enter the number of samples to be submitted (Note: This can affect what processes can be selected on the next step)

- Select from the available processes that can be performed

- Enter the sample information

- Enter any additional order details or instructions

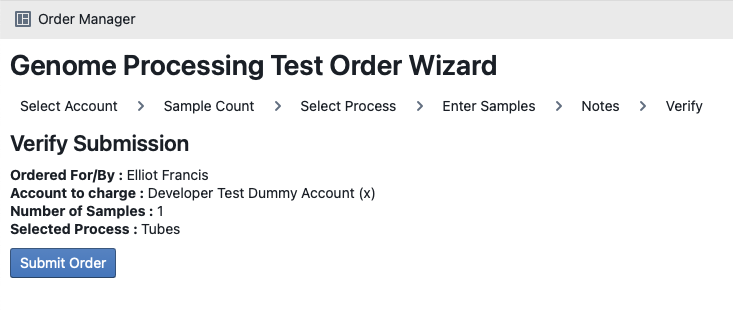
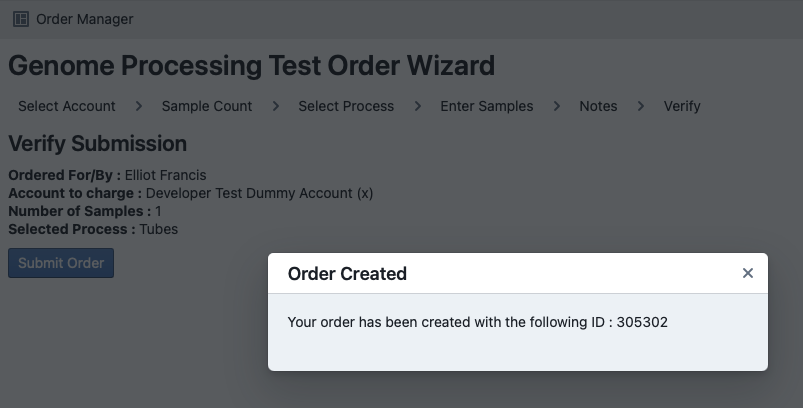
- Review the submission data and click the submit button

- The system will then display your order number and send you to the "Order Manager" page so you can view your submitted orders and their status.


Create a Walkup Order/Event
Walkup services are instruments that are designed to be used for short durations as they are available rather than being scheduled in advance.

When using a walkup service you will be presented with an account selector and start/stop buttons. After selecting an account the Start button will be illuminated and you can then start your usage.

After clicking the start button the event will start.

If you need to leave the page or accidentally close the window you can resume by returning to the page and clicking on the blue button for the already started event.
Resumed events will be treated as one continuous usage period from the the the event was opened. Be sure to close out/end your events for each use session otherwise the intervening time will be counted as part of the resumed session.

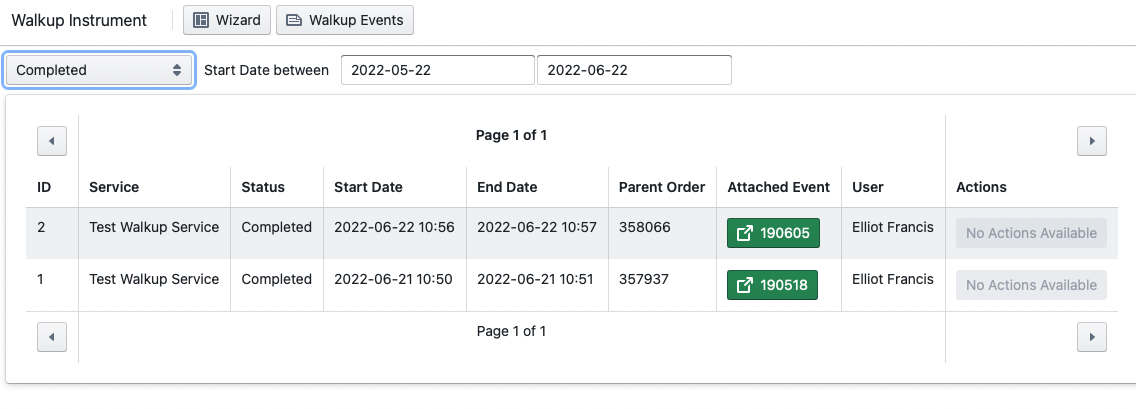
In process/abandoned events can also be viewed in the events manager list.

Once you are finished with your usage click the end button to close out the event. Completed events can also be viewed in the events manager.
New User Guide
Thank you for considering the Health Science Core Facilities for your research needs.
If this is the first time you have used our services then you may not yet have a login for the resource system. Regardless of whether your are a university employees or an external user you will be required to fill out a Work Authorization form in order to receive access to our resource scheduling system.
University Employees
If you already have a uNID follow the steps below to fill out a work authorization form. If you do not yet have a uNID please contact your manager or office manager to have them check with UIT regarding the status of your uNID account.
On Campus Work Authorization Process
- Collect the following information
- Your PI's Full Name, Email, Phone Number and uNID
- The Full Name, Email, and Phone Number of the accounting contact for the account you want access to
- The Chartfield Number, Title, and Start and End dates for the account
- The list of any users in addition to yourself to be granted access to the account
- Your PI's Full Name, Email, Phone Number and uNID
- Go to the On Campus Work Authorization
- Fill out and submit the form according to the on screen instructions.
- Once this form has been submitted your request will be processed as soon as possible, usually withing 2-4 hours during business hours. If you need the Work Authorization processed faster please contact the Cores Administration Office at billing@cores.utah.edu.
Once your work authorization has been processed you will be able to login to the resource system using the U's DUO 2FA login system.
External Users
If you are an external academic or commercial user please use the following steps to request an account
On Campus Work Authorization Process
- Collect the following information
- Your PI/Account Owner's Full Name, Email, Phone Number and uNID
- The Full Name, Email, and Phone Number of the accounting contact for the account you want access to
- The list of any users in addition to yourself to be granted access to the account
- Your PI/Account Owner's Full Name, Email, Phone Number and uNID
- Go to the Off Campus Work Authorization
- Fill out and submit the form according to the on screen instructions.
- Once this form has been submitted your request will be processed as soon as possible, usually withing 2-4 hours during business hours. If you need the Work Authorization processed faster please contact the Cores Administration Office at billing@cores.utah.edu.
Once your work authorization has been processed you will receive a username and password from the Cores Administration Office that you may use to login to the Cores Resource System.