Locations Tab
Locations Interface
All primary actions in the Utah Web Inventory app start in the Locations Tab. On this tab users will be presented with a a list of active locations into which they have scanned or entered. Locations can be added to this list in 3 ways:
- Optical Scan - By tapping the "Location Code Optical Scan" users will be presented with a camera view that will scan the first QR code present in the viewfinder. If that QR code matches the location code format(s) specified in the setting screen regex then the location will be added to the list of scanned locations.
- Manual Entry - By tapping the "Manual Location Add" button users will be presented with a free text field to enter the location code into. Please note that this method does NOT check to see if the location code matches the location regex. Any text entered will be accepted as a valid location code.
- TSL Barcode Scan - Users can also choose to scan a location code with the provided TSL bluetooth RFID/Optical Code scanner. If the scanned code matches the location code format(s) specified in the setting screen regex then the location will be added to the list of scanned locations.
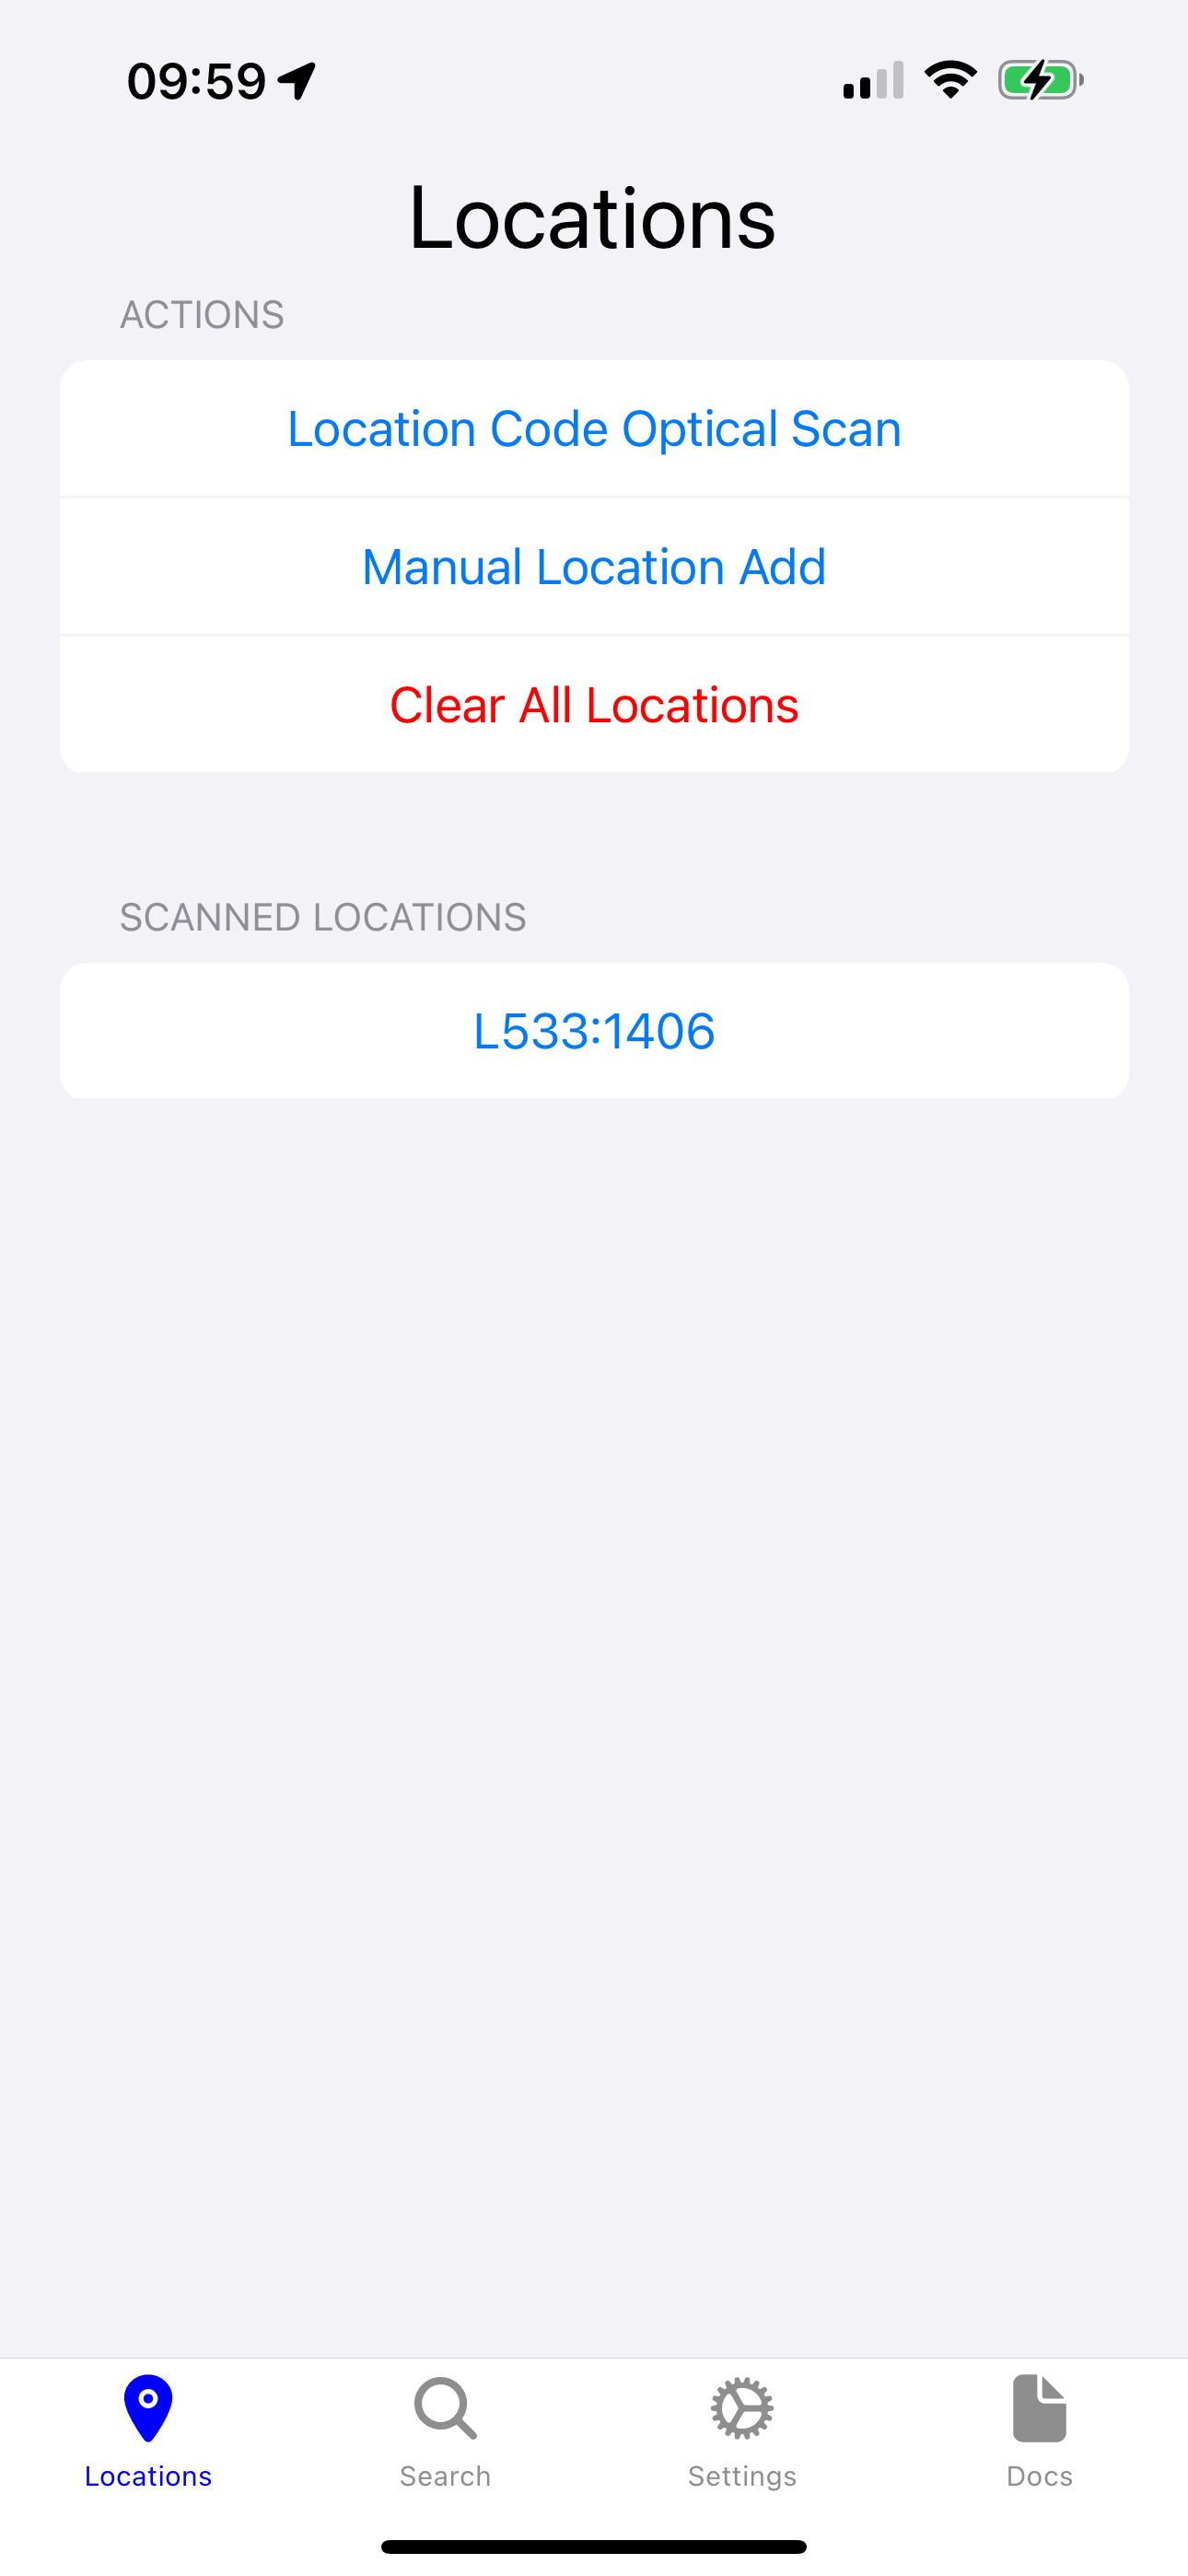
After a location has been added to the list users may tap on a listed location to enter the asset list for that location.
Location Details
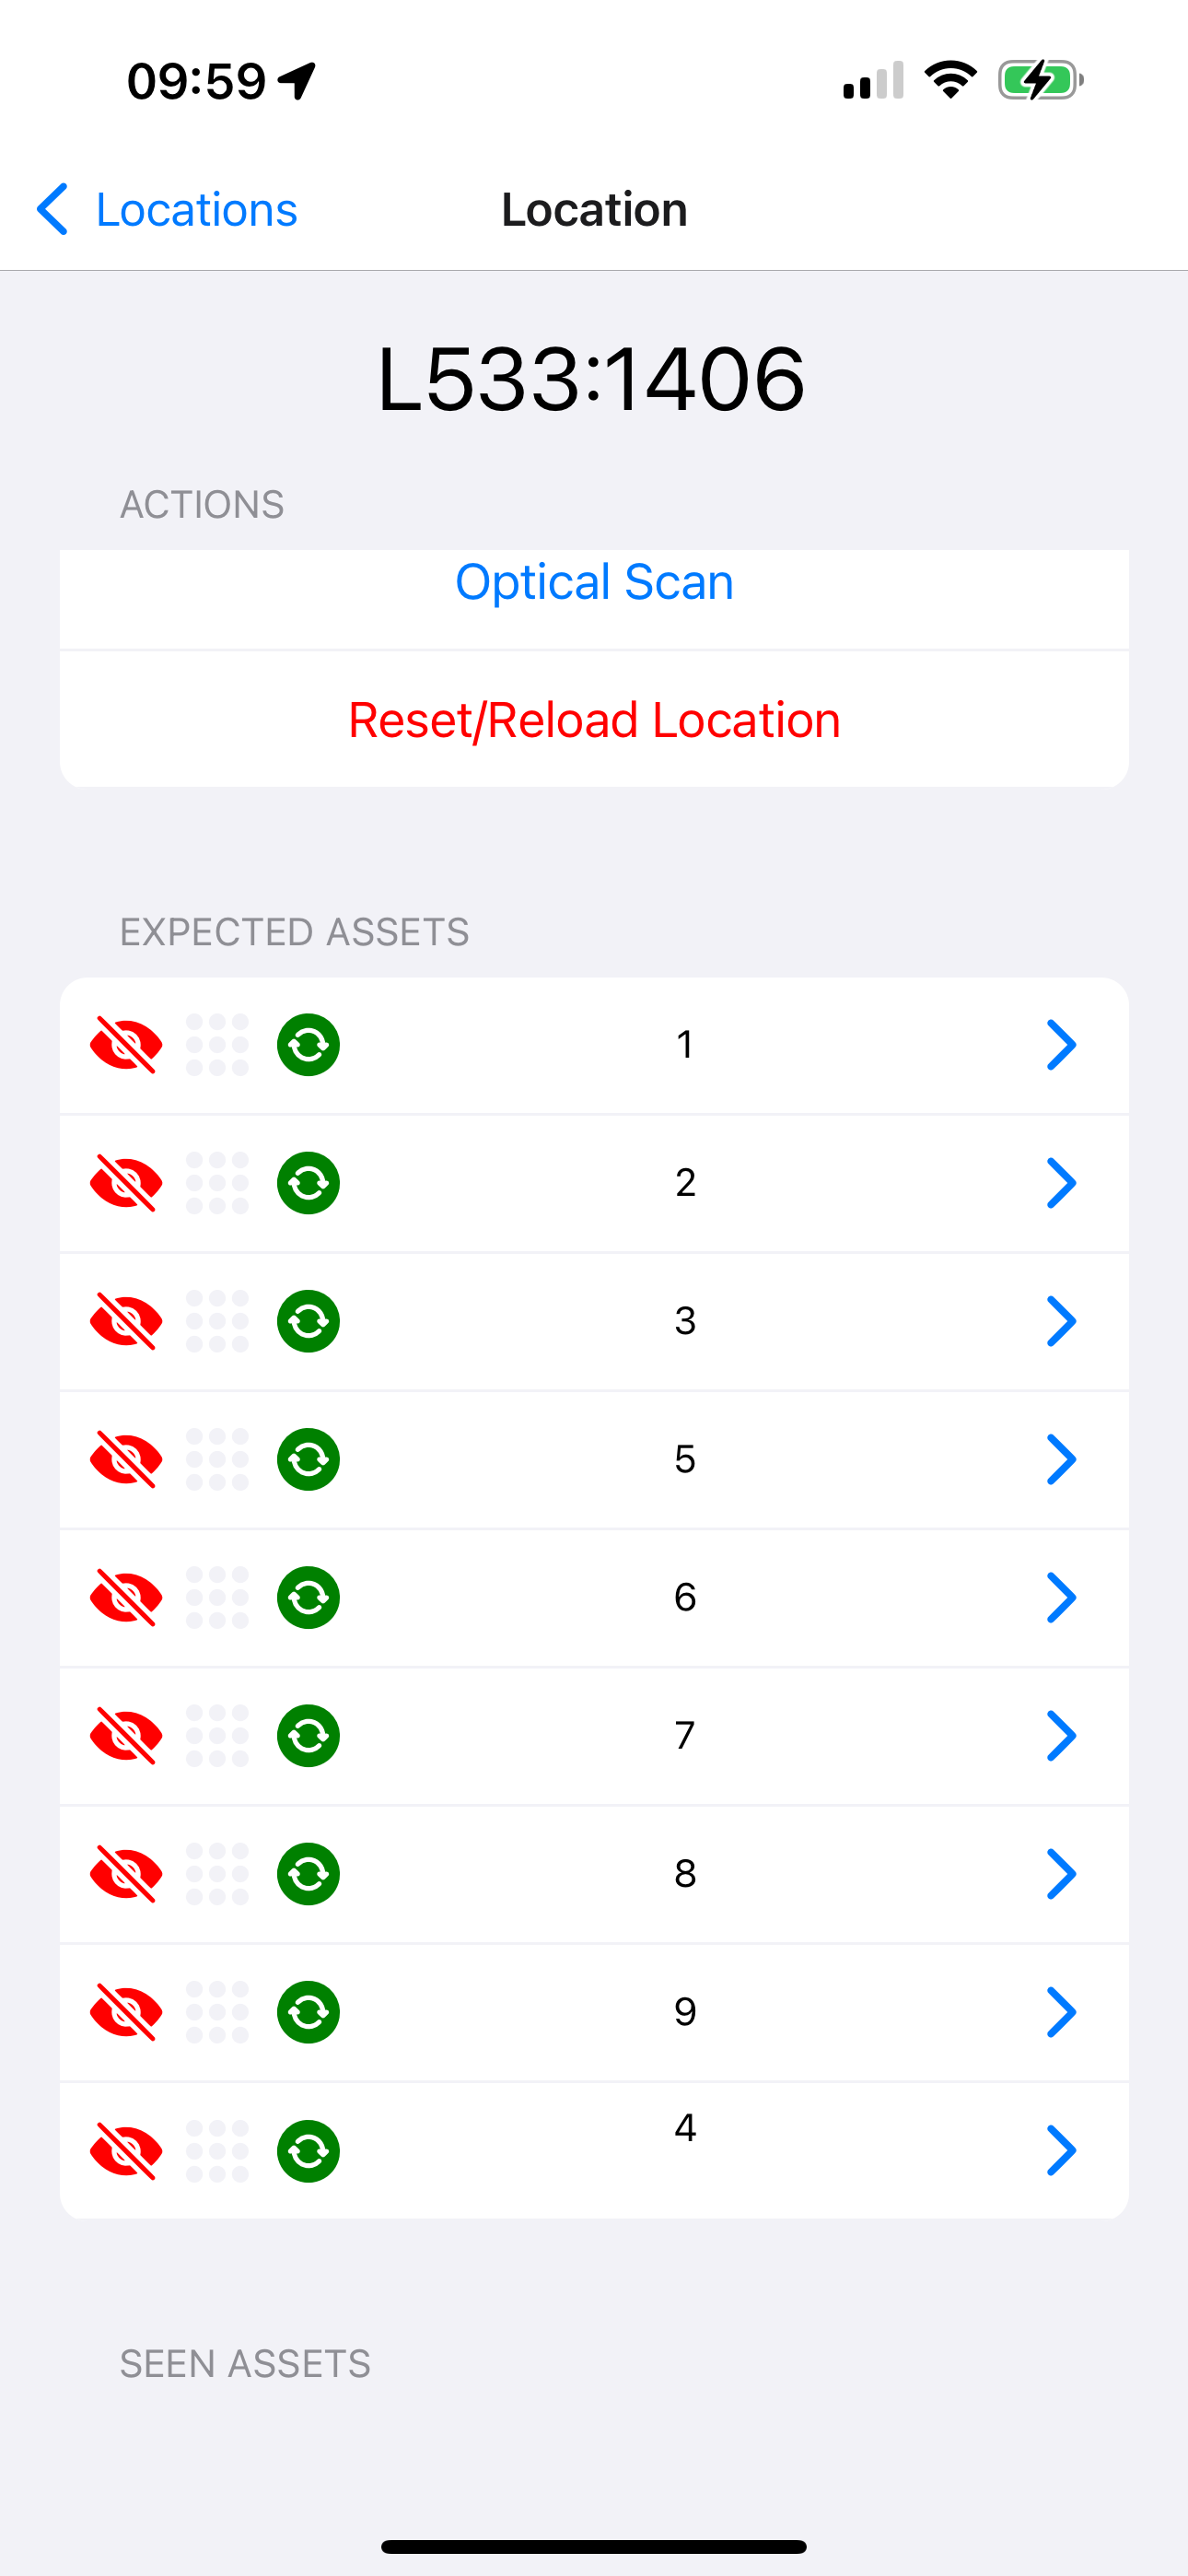
The location details screen is where most inventory actions are performed. Upon loading this screen will fetch a list of expected assets from the server and display them in the "Expected Assets" list. This list allows users to identify the status of all assets expected to be located in this location. As scans are performed assets may also populated the "Seen Assets" list if new or moved assets are scanned. Note that all scans in this view are validated by the Tag Scan regex in the settings tab. Tag scans that don't match the regex are discarded. Users can scan assets in 3 ways:
- TSL RFID Scan
- TSL Optical Code Scan
- Device Camera Camera Optical Code Scan
Incoming scans that match the valid tag formatting will be handled in the following ways:
- If the scan is for an asset in the expected assets list the "Last Seen" date will be updated and the red crossed eye will change to a green eye icon
- If the scan is for a tag number that has not been seen before by the system then the asset will display the tag number and an Add icon that allows the user to register the asset using the asset registration wizard.
- If the scan is for a tag number that belongs in another location but that has been registered with the system the asset will be listed with an eye icon and can be tapped on to view the asset details.
In the "Expected Assets" list assets have 3 icons indicating their states:
- The eye icons indicate whether the asset in question has been scanned / seen inside the configured inventory period (6 months by default, settings adjustable)
- The 9 gray dots or green clipboard icons indicate whether the logged in user is a manager for the asset in question and responsible for its inventory. While all users can register scans for assets only managers can edit the details for a given asset.
- The green/red sync icon indicates whether an asset has pending changes that need to be saved to the server. Green indicates that the asset is sync'd. Red indicates pending changes.
If needed users can open the details of a specific asset from this screen by tapping on the asset in either
Asset Details

In the asset details page users can edit any configured organizational fields. While no fields are currently required any provided fields should be proactively filled out. From this interface users can also view the Reference Image and add new pictures from the device. Additional non-organization data fields can be viewed at the bottom of the screen.